Preparation
First make sure you have your Orchestrator server running and Orchestrator Runbook designer installed on your local machine. Now download and install the Orchestrator Integration Toolkit (more info here).
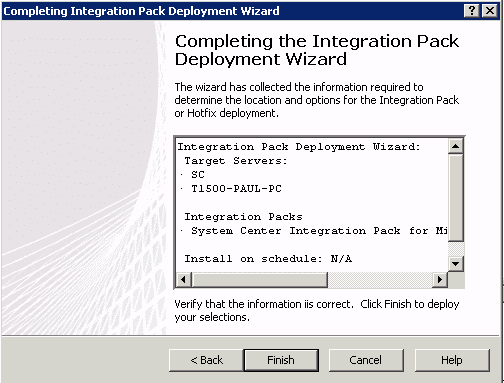
Next thing we have to do register and deploy the required integration pack (System Center Integration Pack for Microsoft .NET Framework Activities) in the Orchestrator Deployment Manager. The name of the pack we need is OrchestratorDotNet.oip and can typically be found in Program Files (x86)Microsoft System Center 2012OrchestratorIntegration ToolkitIntegration Packs.
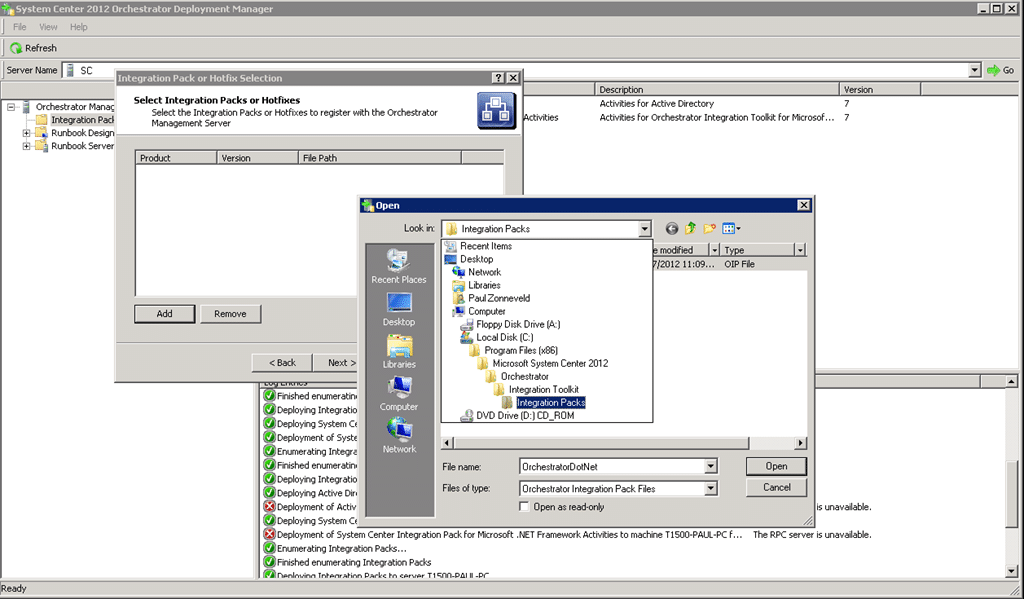
After the pack is registered we can deploy it to the server and the Runbook Designer on our local machine. Make sure your firewall isn’t blocking this deployment!
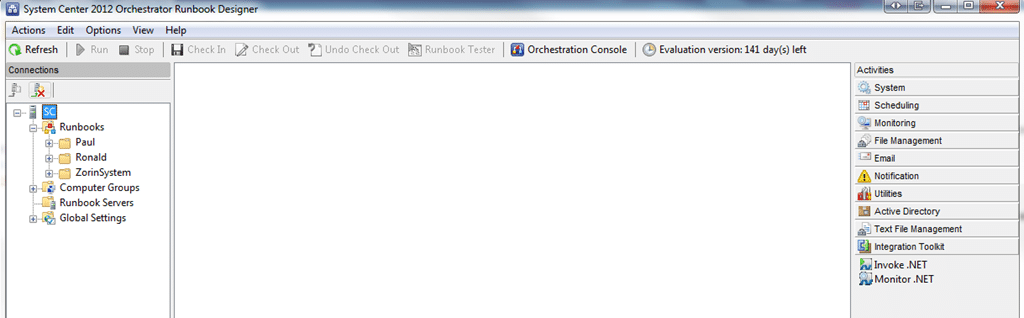
When this is done we now have 2 extra activities available in the Runbook Designer: Invoke .NET an Monitor .NET
Create an activity
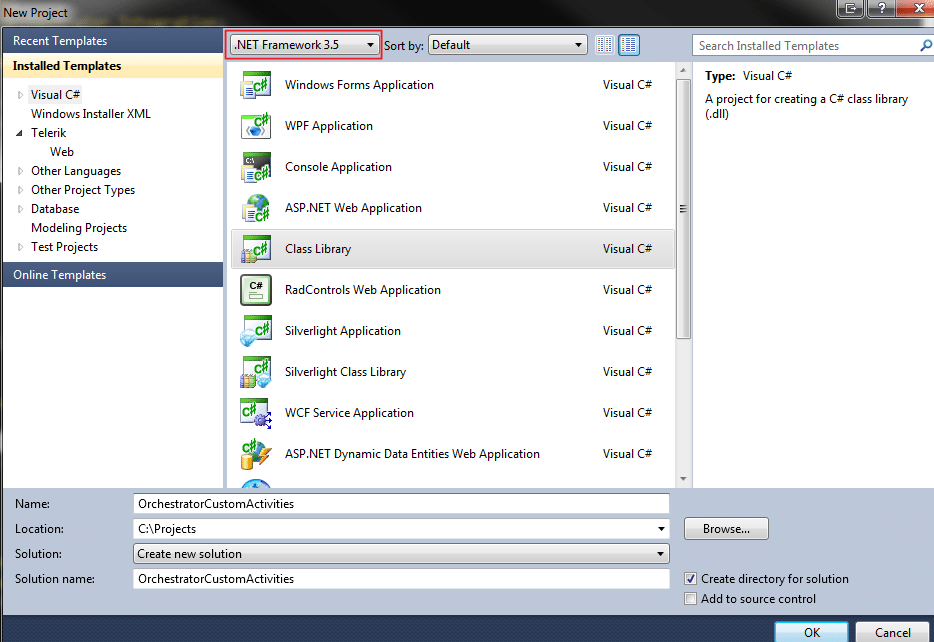
Before we get back to the Runbook Designer we first have to create our custom activity, so start Visual Studio and open a new Class Library project and target the .NET Framework 3.5
Add a reference to Microsoft.SystemCenter.Orchestrator.Integration.dll, typically you can find it in Program Files (x86)Microsoft System Center 201OrchestratorIntegration ToolkitLib.
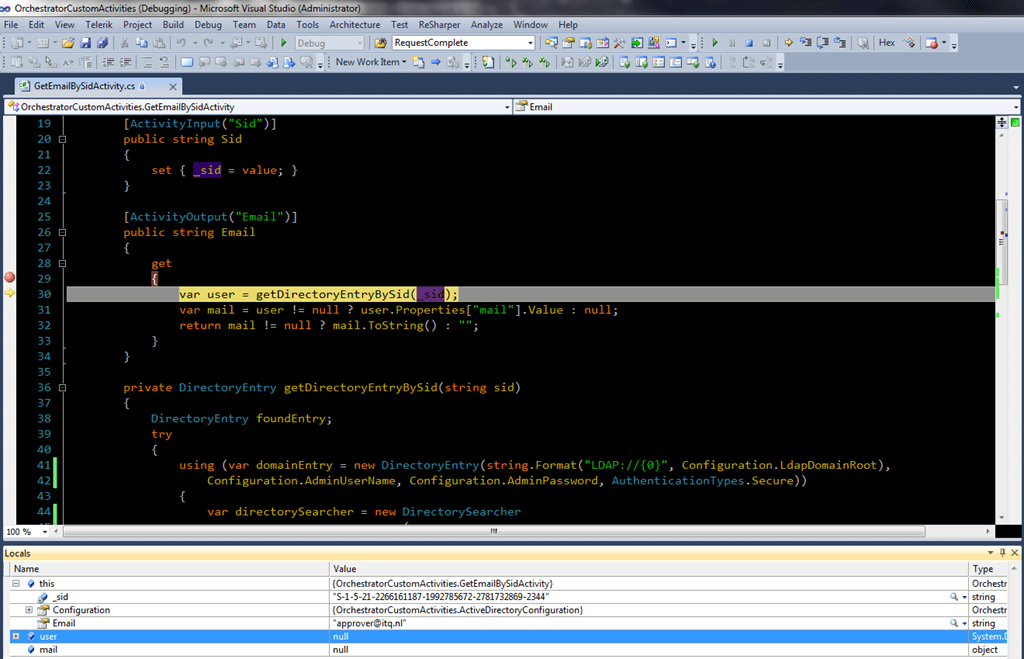
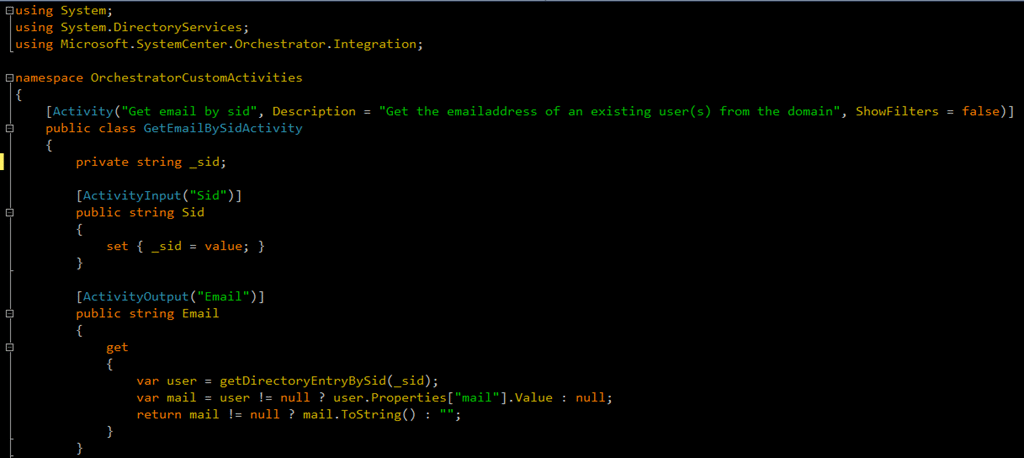
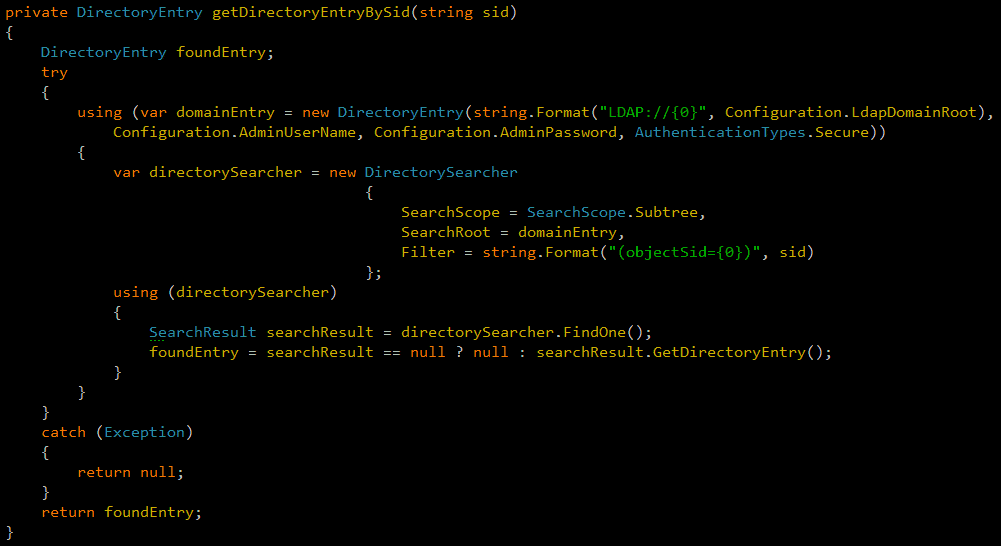
Now add a new class for the activity, in this example I want to get an email-address of a user from the Active Directory with a SID, so I call it the GetEmailBySidActivity and the following line to the using section:
using Microsoft.SystemCenter.Orchestrator.Integration
There are 2 ways of creating an activity; a declarative approach and an imperative approach. The latter gives some extra control how items are displayed or how data is handled (more info here). Since we don’t need this in this activity I chose the declarative approach (explained here). Nothing complex here, we simply need to add an [Activity] attribute to the class and create some input and output properties. To the input properties we need to add an [ActivityInput] property, to the output properties [ActivityOutput]. So we now have this:
Create configuration
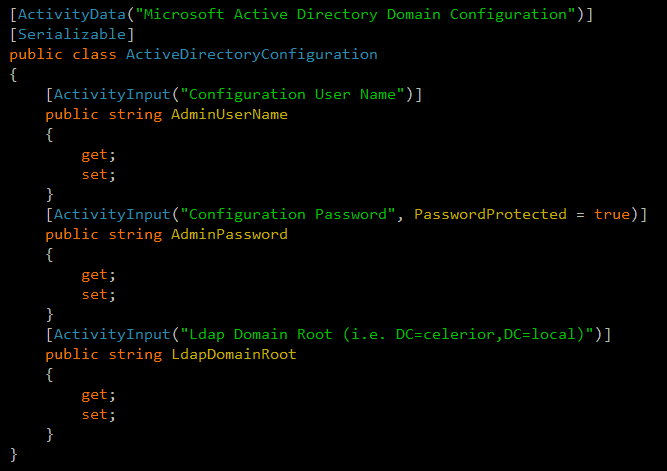
Since we need some information to connect to Active Directory we need a good place to store these configuration settings, so they can be reused by multiple activities. We can do this by making an ActiveDirectoryConfiguration class. Again this is simple; we just need to add an [ActivityData] attribute to the class and [ActivtyInput] attributes to our properties:
We can add our configuration to the activity by creating a Configuration property and decorate this with the [ActivityConfiguration] attribute. With this done we can now use the Configuration to connect to AD and retrieve the user object:
Ok, ready to test, just built it and get the dll from the bin folder of your project!
Debug an activity
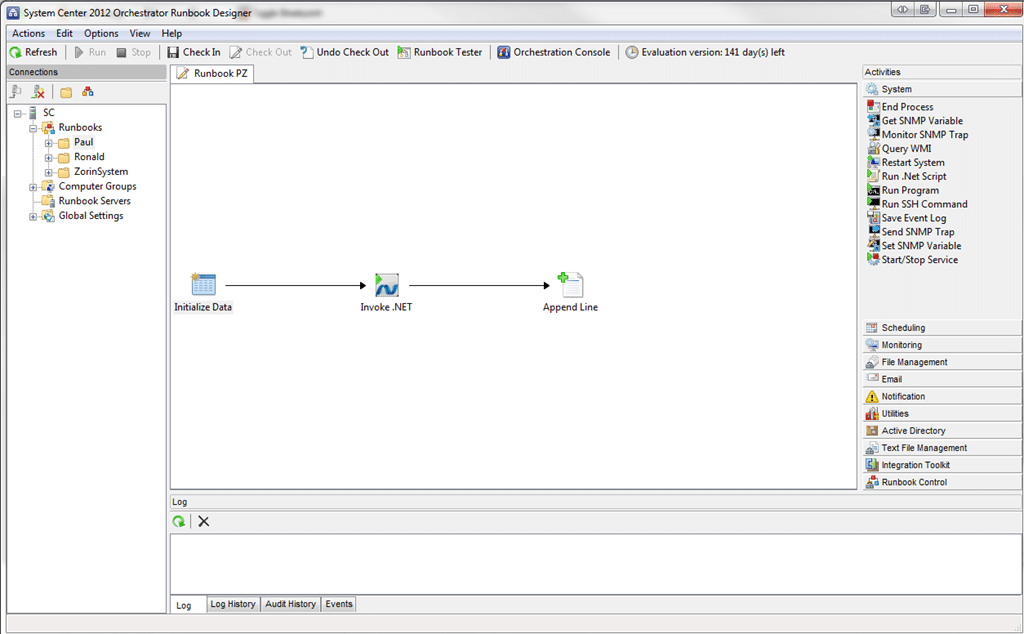
Startup the Runbook Designer and drag an Initialize Data, an Invoke .NET and an Append Line activity to the designer. The first we need to enter our input data, the last activity to write the results in a log file to test if our Runbook works.
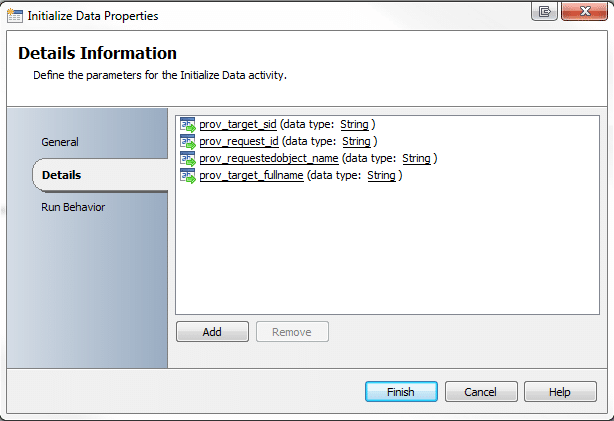
Make sure the Initiliaze Data has all the necessary parameters for our custom activity and the desired output:
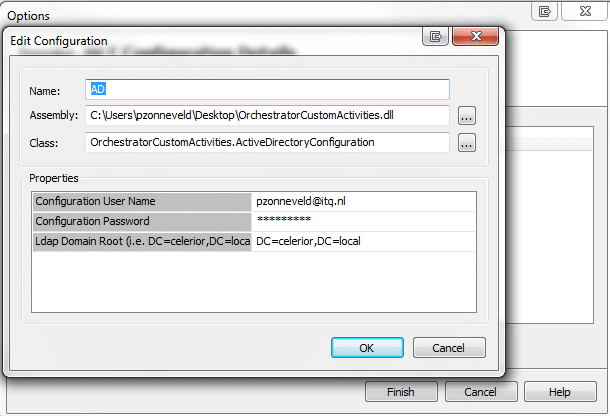
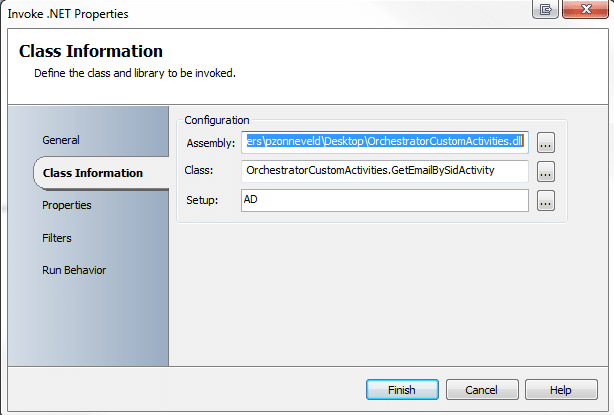
After this we need to configure our GetEmailBySid activity in the Invoke .NET activity. Go to properties and select the Assembly and Class. After this is done we can now add a configuration to the Invoke .NET activity under Options –> Invoke .NET:
We can now go back to the Invoke .NET properties and select our configuration:
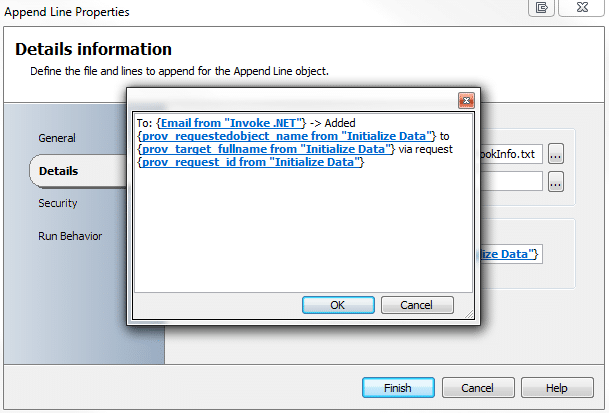
Go to Properties tab and here we see the Sid input property, we subscribe this property to the prov_target_sid from the Initialize Data activity (Right click –> Subscribe –> Published Data) Then we do the same in the Append Line activity, but now with the output property from our activity: Email.
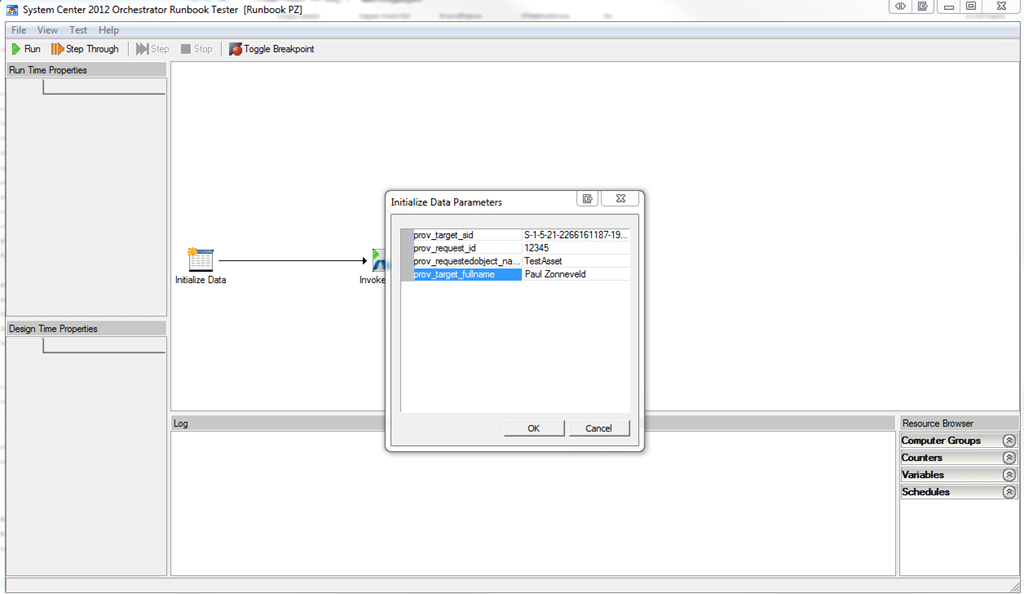
With the runbook now ready we can start debugging our activity by starting the Runbook Tester and press Step Through. Enter our input parameters an press OK.
Switch over to Visual Studio and click Debug > Attach to Process. Make sure that the Attach to field says “Managed (v2.0, v1.1, v1.0) code”. If it doesn’t, click the Select button and select that value. Now look through the process list and select PolicyModule.exe. If you don’t see it, make sure the checkbox for “Show processes in all sessions” is checked. (more info here)
Set a breakpoint and press Step again and the breakpoint will be hit and we can debug the code!