For the past couple of months, I have been experimenting with different setups of lab equipment because I wanted to take my homelab to the next level. The primary reason being that my old lab was a noisy and power consuming system. It performed pretty well and satisfied all my needs (like building the F1 Racing Simulator with VMware Horizon, Blast Extreme, and NVIDIA vGPU), but for future requirements (I want to play around with vSAN, more vGPU stuff for AI/DL and VDI and easily extend the lab with more hosts), the lab wasn’t sufficient anymore. In this post I would like to explain what requirements I had, what hardware I choose and how I built it.
Requirements
I wanted to approach the homelab design like I would approached any other customer design, so I started out with some requirements (although these requirements might not be usable in a customer design  )
)
- The homelab must be low-powered, preferably limited to 75 watts per host.
- The homelab must be powerful enough to run multiple virtual desktops similarly for benchmark testing.
- The homelab must support half-height PCIe NVIDIA Tesla GPUs.
- It should be easy enough to scale up/out (more memory, disk capacity/extra hosts).
- vSAN All-Flash must be supported, preferably with multiple disk groups.
- Because vSAN All-Flash needed to be supported, 10GbE had to be supported as well.
- The form factor of the individual hosts need to be as small as possible (since I have half-height 19-inch rack in my man cave.
- The hosts should make as less noise as possible.
- The hosts and vSAN components need to be on the VMware/vSAN HCL.
- IPMI is a must-have since I want to be able to remotely power-on/off the hosts.
The road to the build
My employer ITQ stimulates people to be creative (hence the F1 simulator on VDI). Another example of this is the fact that my colleague Laurens (vDrone) created the idea to build a mobile lab, based on Supermicro E300-8D hosts. A brilliant idea as it seemed, because the specs of the lab fulfilled most of my requirements: It was low-powered, it ran VMs such as vROps and vCenter like a charm, the hardware is on the VMware HCL, supports vSAN, has 10GbE, don’t make loud noises and are very, very small. It almost sounded too good to be true. But, because I wanted to test it out as well, I ordered one including an NVMe flash drive, 64 GB of RAM and a PCIe x8 toa x16 converter (since it only supports x8 and the GPU needs x16).
The E300-8D has a 1U small form-factor and after replacing the standard fans with noctua ones (which I do with all of my gear), I was good to go.
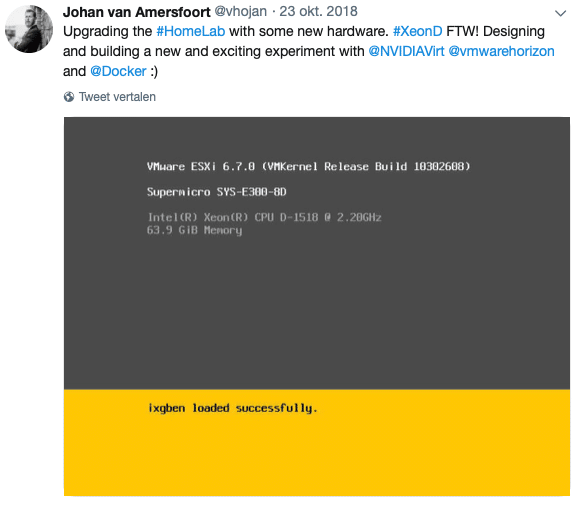
Although a Tesla P4 fits perfectly in a Supermicro E300-8D, the PCIe x8 to x16 riser and some extra cooling didn’t show the result I was hoping for. The PCIe x8 slot is unable to handle the bandwidth a Tesla P4 requires to perform well. And so, I had a perfect first management node for my new lab. Management because it’s unable to run virtual desktops and other VMs containing a (v)GPU.
As the power consumption did fit my needs (it only used about 45 Watts while running a vCenter, vROps, Horizon Connection Servers, an NSX Manager/Edges, and my UAGs). And since I only populated half the RAM slots, I could also expand if needed.
So, the search continued. The E300-9B was already announced, but the expected price for a single unit was double the pricetag of an E300-8D, so that was off limits (I had a budget constraint). After calling directly with Supermicro and explaining my plan, they came up with a solution. Apparently they sold the same motherboard as the E300-8D, but with a different PCIe slot, namely a x16 slot! The Supermicro X10SDV-4C-TLN4F to be precise.
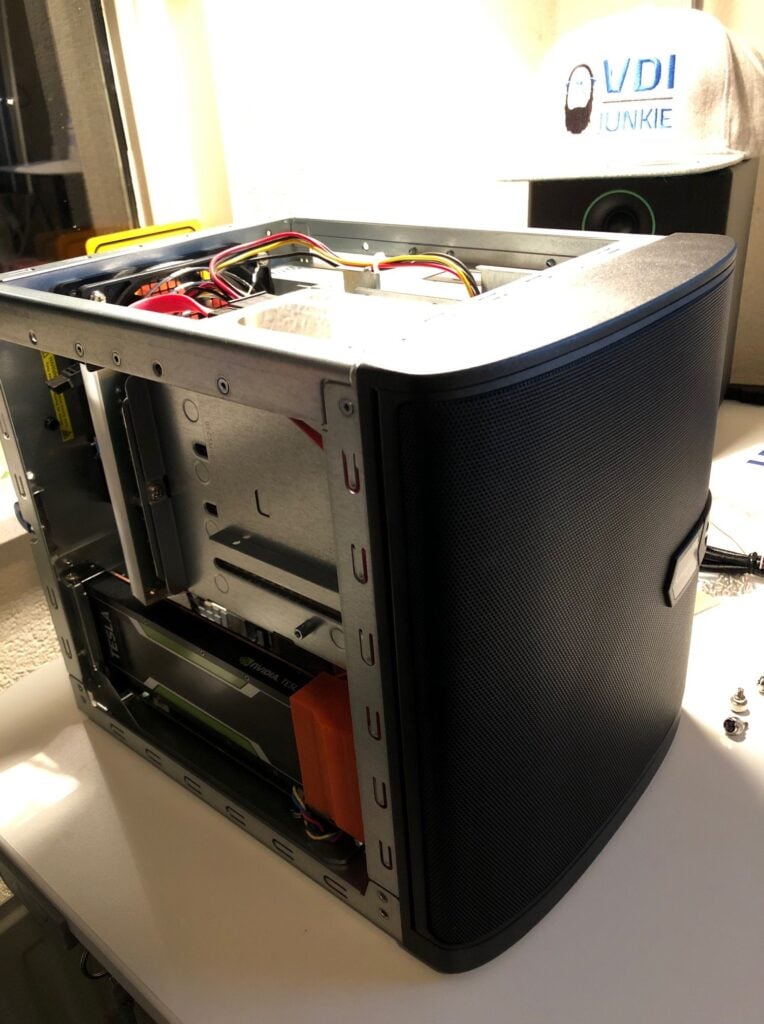
The challenge was the housing though. Because an NVIDIA Tesla P4 requires a lot of cooling to avoid it overheating and that cooling isn’t simply possible with an E300-8D housing. So, I decided to go for a slightly bigger form-factor, the Supermicro CSE-721TQ-250B Micro tower case.
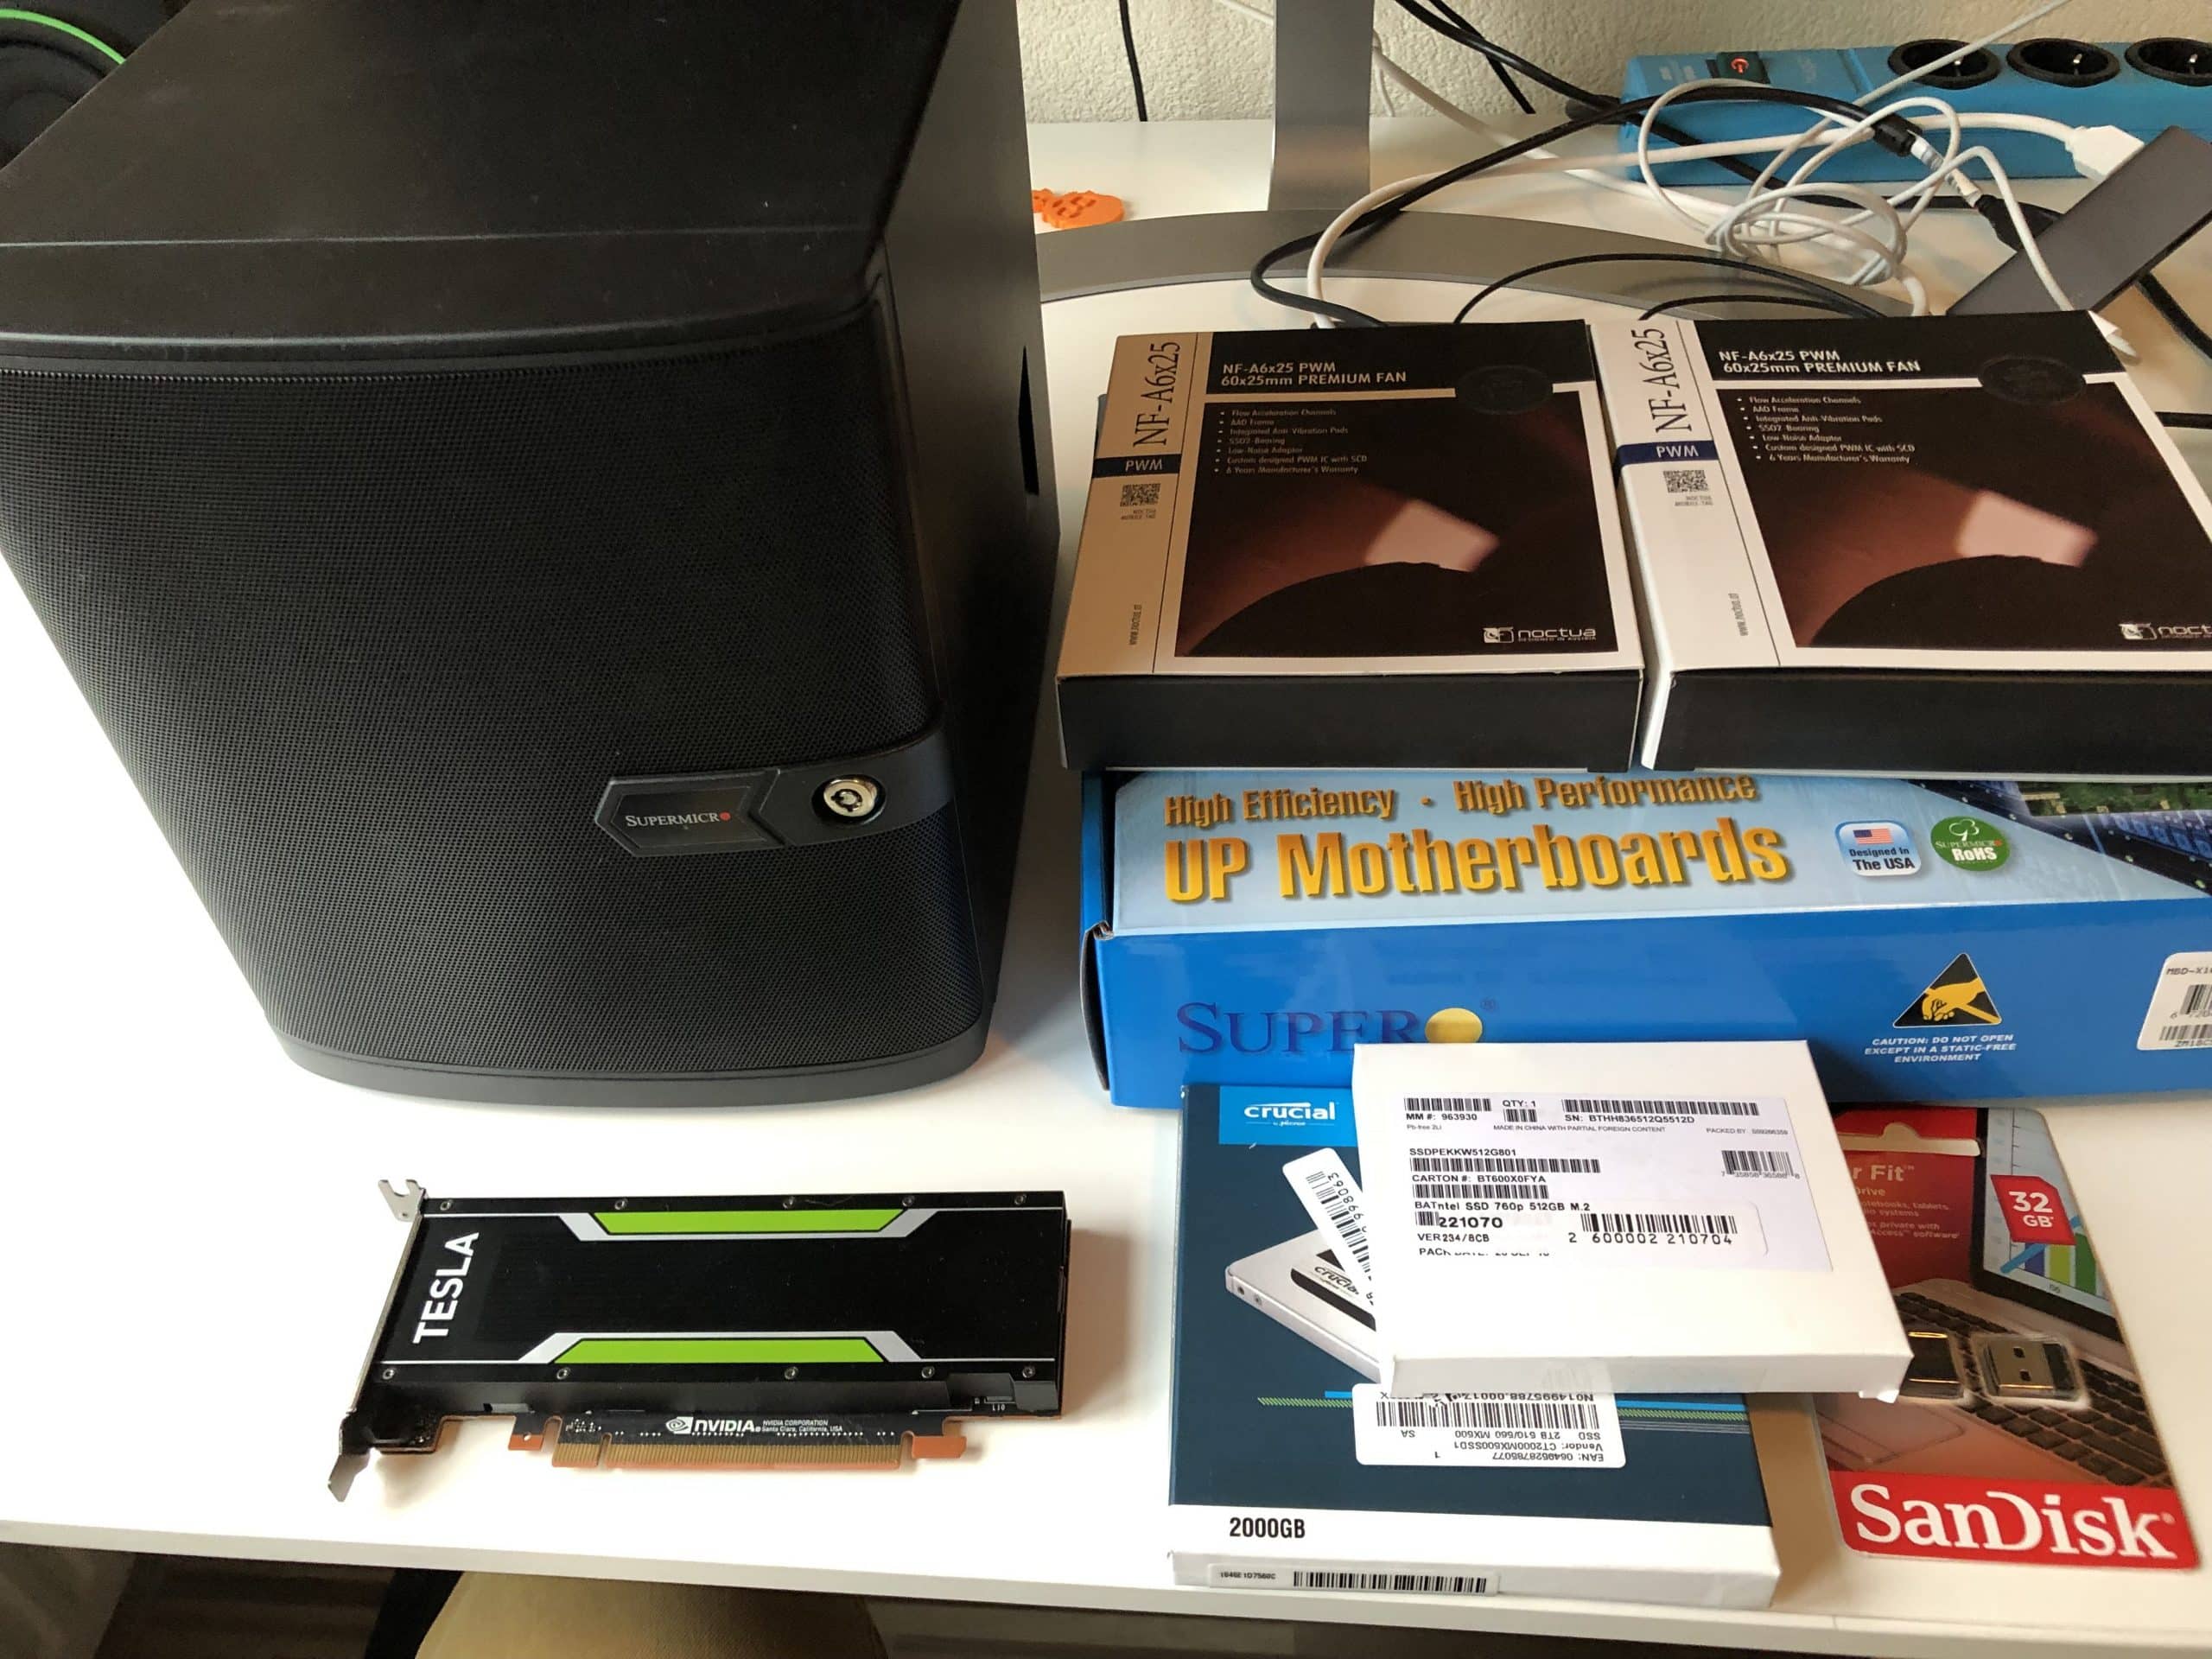
So I got the board and the case, I ordered an Intel 760p NVMe 512GB drive as vSAN Cache disk and a Crucial MX500 2TB as a capacity disk, added some memory and as shown on the picture below, Noctua fans 
The challenge with the board was that it is passively cooled and relies on an active airflow. Since the case doesn’t provide that, I had to come up with a solution. Luckily for me, someone else already did that. In this post you can read how you are able to cool the CPU, while still having a quiet system.
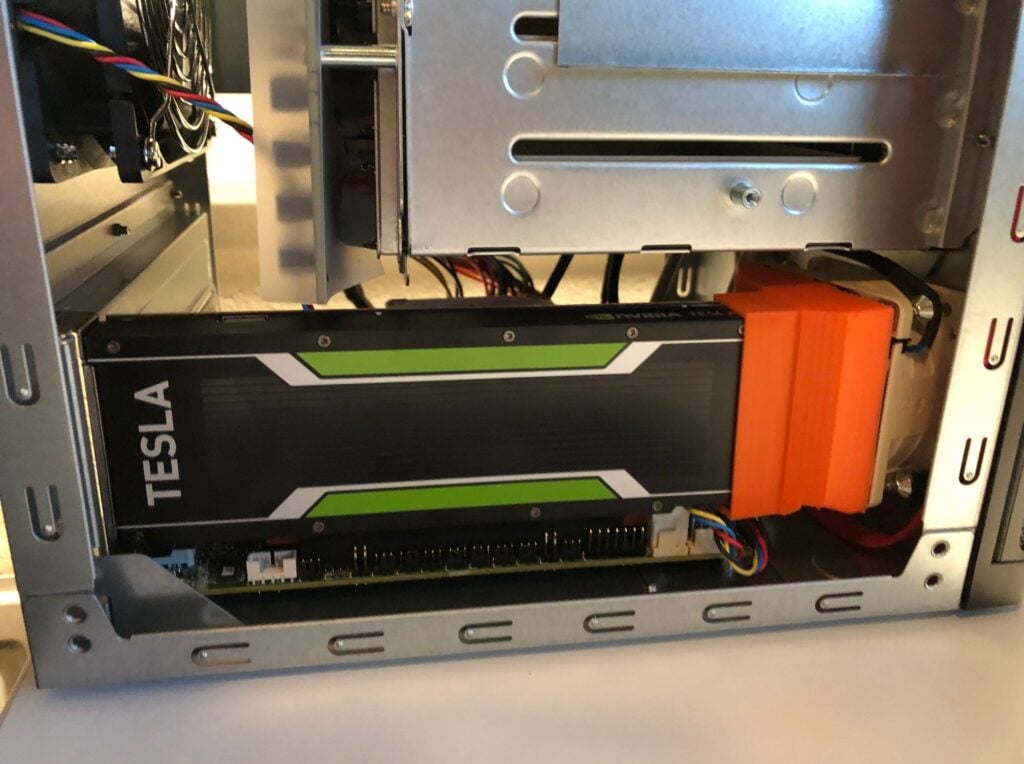
The second challenge was the GPU. The Tesla P4 (like more Tesla GPUs) are passively cooled and not designed to run in such a tiny case without a proper airflow. But I would’t be the Bearded VDI Junkie and nerd that I am if I couldn’t design a solution. And so I did. I designed a similar fan mount like this one, but for a smaller fan and tinier space. The space in which the fan and mount had to fit was pretty small, and after multiple versions with different approaches, I finally got to a design that keeps the GPU at a perfect 85 degrees Celsius while performing really good and stay quiet-ish.
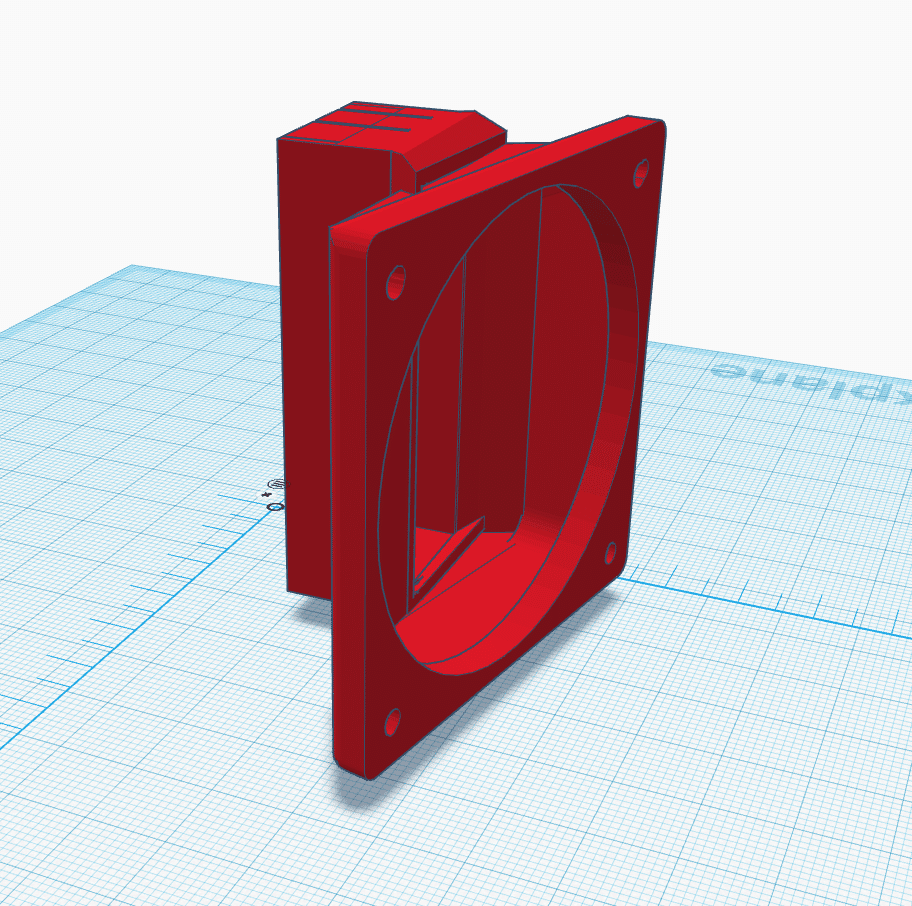
The fan is attached to the front of the mount. The whole thing is attached to the back of the Tesla P4 and pushes the air in (instead of sucking the air out, which doesn’t offer sufficient cooling).
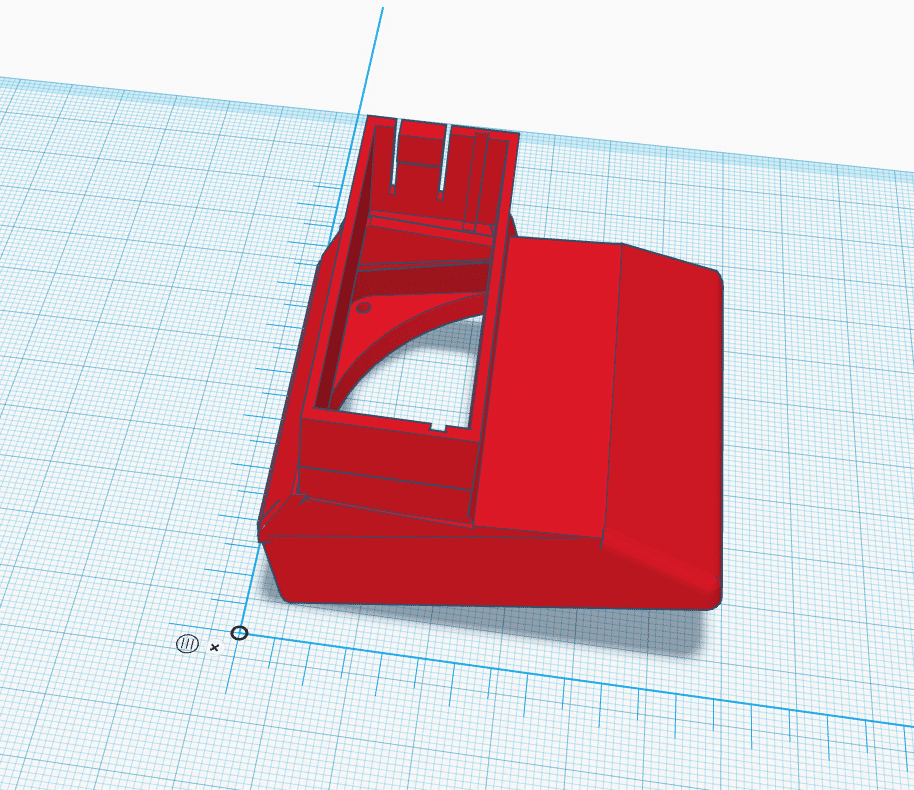
The file can be downloaded for free here:
With it you can print your own. After attaching everything, the host looks like this:
After mounting everything in my 19-inch rack, it looks like this:
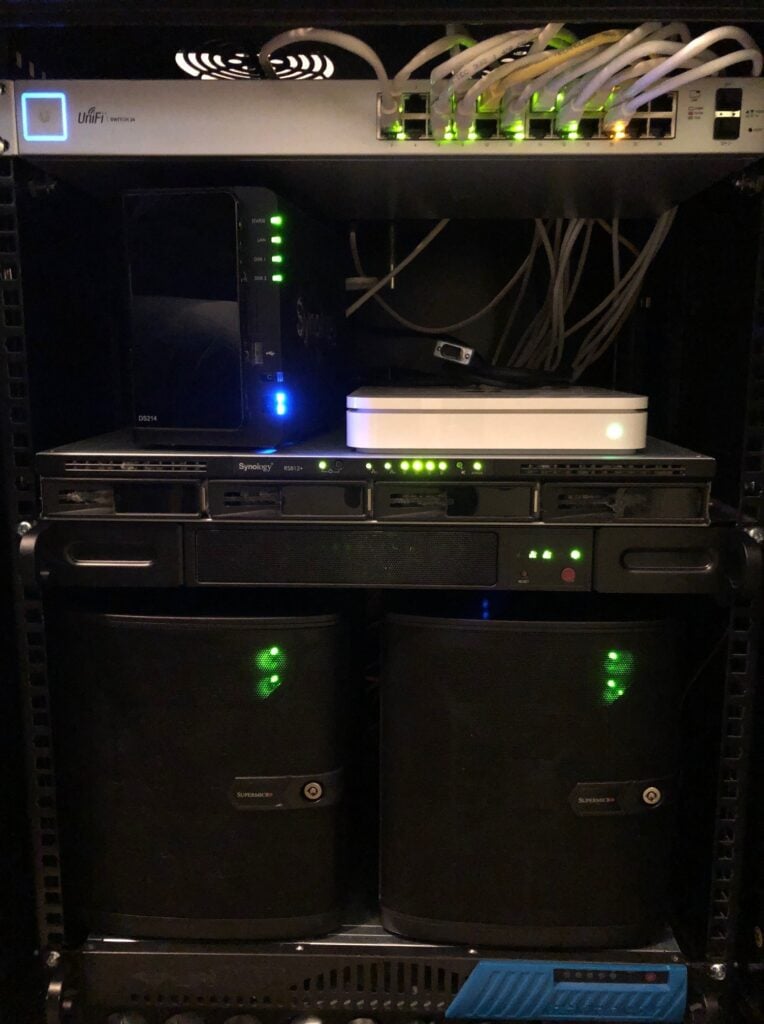
You can see a Ubiquiti 24 port 1GbE switch, two Synology appliances and an Apple Timecapsule (which I will consolidate in a single Synology appliance in the future) and underneath the Supermicro E300-8D and two hosts ready for VDI/vGPU/vSAN All-Flash.
The following list is an overview of the components I used:
| Number | Item | Price per item |
Total per item |
| 2x | Supermicro X10SDV-4C-TLN4F | € 527,57 | € 1.055,14 |
| 2x | Supermicro CSE-721TQ-250B | € 172,66 | € 345,32 |
| 1x | Ubiquiti UniFi Switch 24-poorts | € 190,- | € 190,- |
| 1x | Supermicro SuperServer SYS-E300-8D | € 739,13 | € 739,13 |
| 6x | Noctua NF-A6x25 PWM, 60mm | € 14,14 | € 84,84 |
| 4x | Crucial CT32G4RFD4266 | € 310,50 | € 1.242,- |
| 3x | Crucial MX500 2,5″ 2TB | € 279,- | € 837,- |
| 3x | Intel 760p 512GB | € 122,95 | € 368,85 |
| 2x | NVIDIA Tesla P4 | € 2492,20 | € 4984,40 |
| Total without GPUs |
€ 4.862,28 | ||
| incl. GPUs | € 9.846,68 |
I added the prices of all components through a dutch site called tweakers.net. Everything is clickable to their pricewatch site.
The installation of all the components was pretty straight forward. In a next post I will dive a bit deeper in the installation, benchmark tests and how I solved some more challenges (such as controlling fan speed based on temperature of the GPU).
The post Building a low-power vSAN & vGPU Homelab appeared first on vHojan.nl.
The original article was posted on: vhojan.nl