Last week we posted the first part in the Software Defined Storage series presented at our annually Technical Update Session. (Link).
In this second part we are focusing onVMware Virtual SAN (aka VSAN) installation, configuration and tests.
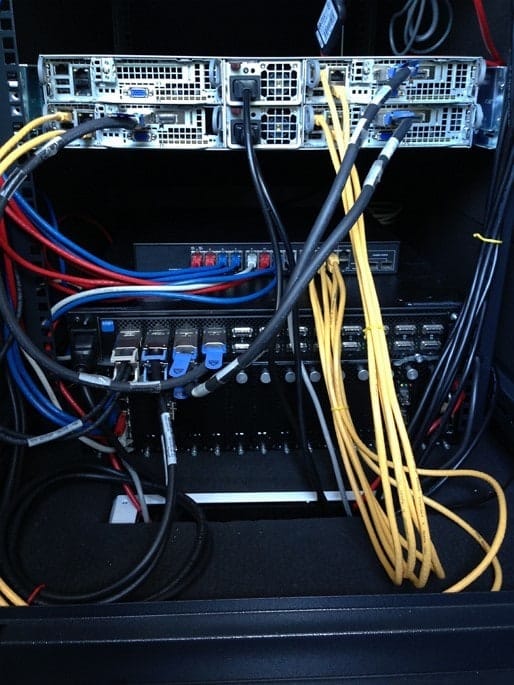
For all of the SDS tests we used our Supermicro Virtual SAN Ready Node (Link) which is equipped with the following goodies :
3 Supermicro X9DRT-PT nodes running vSphere 5.5U1
2 x Intel Xeon E5-2620v2 (@2.10GHz)
64 GB RAM
1 x M4 100GB SSD (OS disk)
1 x Intel 3700 100GB SSD (Repository disk)
1 x Intel 3700 200GB SSD (VSAN disk)
3 x Seagate 1TB SATA (VSAN disks)
1 x Mellanox MHGH28-XTC

The three nodes are connected to a Xsigo VP780 IO Director over infiniband, which provides 4x10GbE for vMotion, iSCSI, Virtual Machine and VSAN connectivity. And 1GbE for IPMI and stand-by management connectivity.
The basic requirements for VMware Virtual SAN are:
- Minimum of 3 hosts with a minimum of 6GB RAM
- VMware vSphere ESXi 5.5 and vCenter 5.5 with the Webclient enabled
The hosts that are going to be a member of the VSAN cluster do not all have to have local disks. The ones that are going to have local disks have to meet the following requirements:
- At least one SAS or SATA or PCIe Flash or SSD on each host for caching
- At least one SAS or SATA Disk on each host
- A storage device which is listed in the vSphere Compatibility Guide and able to set up in RAID-0 or pass-through
For sizing of the caching disks the rule of thumb guideline is around 10% of anticipated storage capacity usage.
Now that the requirements are checked and the infrastructure is configured, we can start the installation of VSAN! First off like all good consultant we started with reading the documentation, but wait why can’t we find it on the VMware Documentation site? The reason for this is that VMware Virtual SAN is part of the vSphere suite and the documentation is located under vSphere Storage as “Working with VSAN” (Link).
The steps for the installation are quite easy and consists of 4 steps :
- Create a vSphere ESXi Cluster (if you haven’t done that already)
- Enable the Virtual SAN traffic on the VMKernel adapter
- Assign a License Key to the VSAN Cluster
- And voilà you are done with the installation and a beautiful datastore called VSANDatastore is created and you can go wild with deploying your VM’s!
For us the part of automatic claiming the local disks didn’t go as planned because there weren’t any disks available. After digging around the solution was quite simple we already used the local disks for the Maxta MxSP test and there was a VMFS created on the disks! Which is a big No-No for VSAN. After deleting the VMFS from the disks and re-enable the VSAN Cluster the disks where automatically claimed and our VSANDatastore was created.
The default Fault Tolerance setting of VMware VSAN is N+1 and can be compared with RAID-1. If you want to tolerate a higher number of failures you can create a VM Storage Profile with a maximum of N+3. For our SDS tests we did leave the setting at the default N+1.
For the SDS tests we have deployed 6 Windows 2008 R2 VM’s per hosts that are going to serve as IOMeter workers and are used to see how the SDS solution handles all kind of horrible failures and if the VM’s where still accessible.
We threw all kinds of failures at VSAN and it took it like a trooper! When we failed a magnetic disk from one of the host VSAN noticed it right away and marked the disk as “Degraded” and started the rebuild immediately to another disk. When we were in a crazy mood and pulled a host without setting it in maintenance mode VSAN marked the host as “Absent” and waited 60 minutes (this is configurable setting) and started the rebuild to another host! We also observed, when we failed the SSD disk from one of the host, the whole diskgroup was marked as “Degraded”. So some good advice don’t skimp on your SDD’s. In not one of our tests the worker VM’s suffered from inaccessibility to the datastore.
So the product is quite resilient, how about performance? About this question we can be quite short: Wow!?!…
In our configuration and our tests it can give a large SAN a run for its money. VDI, SQL or Max throughput you can put VSAN through most workloads without breaking a sweat!
The only thing we were really surprised about (and not in a good way) was that no performance counters were available within the vSphere Web Client. If you want to see some performance counters of the VSAN Cluster you need to start the VSAN Observer from the vCenter RVC (Ruby vSphere Console) and open it in a web browser. The information and statistics that VSAN Observer shows are quite good but the drawback is that it default runs 2 hours only and no historic data.
At the end of our SDS tests we were quite happy with the overall performance and resilience of VMware Virtual SAN. We can’t wait for all the new functionalities that VSAN is going to receive in the near future, which of course we are going to test and write about!
We can write on and on about this product. The integration with VMware Horizon, best practices or the pro and cons about VSAN but this blog is about the basic comparison between the different SDS solutions so if you have any further questions about VMware Virtual SAN don’t hesitate to contact us!
Stay tuned for the Technical Update session 2014 : SDS Part 3 EMC ScaleIO!