Linux VDI. It sucks. Period. Although it seems very easy to deploy and maintain, it isn’t. It’s some kind of voodoo that is hard to master. It could work when setting up your VM in a specific way on a specific system, but when doing the same thing in the exact same way but on a different system it could fail for unknown reasons. This post is not dedicated to completely burn down everything that has to do with Linux VDI. Nope, instead, it completely explains what I did to make it work in my specific situation. Before I go into details, let me first give a big shout out to my ITQ colleague Ariel Cabral. His help was essential in making this work.

Start with Why?
Why? Why would you even consider a Linux OS to run your desktop applications on? Years ago, I wouldn’t probably be able to give you an answer, other than some specific developers require it. But that was 5 to 10 years ago before the whole DevOps transition began. Linux as an OS is gaining popularity in all kinds of industries and job types. In a project have been working on, one of the use cases that required Linux are medical data scientists. People who have a strong focus on analyzing medical data such as images and videos, but do that with their self-built python scripts that leverage the power of Deep Learning frameworks like TensorFlow so it can be automated and increase the success rate of their research. In this case, the Why was quite simple. Linux was essential for their software to run properly, and since one of the customer’s goals was to move everyone and everything to a single platform (instead of having multiple silos), the quest to master the voodoo and build a Linux VDI commenced.
Virtual Machine
The first step in building the Linux Virtual Desktop, is to actually create the VM. I did the following:
- Add the new VM
- Use the following specs
- VM Version 14
- OS: Ubuntu Linux 64 Bit
- 2 vCPUs (or how many you need)
- 4 GB RAM (same thing)
- 40 GB Disk size
- VMXNET3 NIC
- Please wait before adding the vGPU profile before the first part of the Ubuntu installation is finished
Before the next steps, I would recommend to create a snapshot after each step. This will ensure you don’t have to start all over again in case the voodoo strikes you (it saved me from a lot of cursing/swearing) 
Ubuntu Installation
I choose to install Ubuntu 18.04 instead of the desktop version. The main reason is that Ubuntu Desktop comes with a lot of fluff you won’t be needing. Follow the following steps to get Ubuntu with all core parts running:
- Install Ubuntu 18.04 Server
- Include openssh during the installation
- As soon as the Ubuntu base installation is finished, I installed the following bits and pieces:
- KDE (Desktop Interface)
- Zenity (shows graphical dialog boxes in commandline)
- xinput (utility to test X Input devices such as mice/keyboard)
- Python/python-dbus/python-gobject (script language and libraries)
- Lightdm (alternate displaymanager, required for Horizon/vGPU)
- GCC (GNU Compiler Collection)
- Make (required to build/install software)
- you can use the following command to install them all at once:
- apt-get install kde-plasma-desktop zenity xinput python python-dbus python-gobject lightdm gcc make
- Reboot
- Select LightDM as the default display manager
Horizon Agent Installation
The next step will be to install the Horizon agent. Download the latest version of the Horizon Agent and make sure to save it on a location that is accessible from the Ubuntu VM. I used version 7.8 (VMware-horizonagent–linux-x86_64-7.8.0-12610615.tar.gz)
- On the Ubuntu VM, open the Terminal and go to the directory where the Horizon Agent is located.
- Unpack the .tar file:
- tar –xvzf ./VMware-horizonagent–linux-x86_64-7.8.0-12610615.tar.gz
- Install the Horizon Agent (It should work as the dependencies were installed during the Ubuntu installation section)
- cd VMware-horizonagent–linux-x86_64-7.8.0-12610615
- ./install_viewagent.sh
- Reboot
vGPU Installation
For a Linux Desktop to run Deep Learning workloads, it’s quite essential to install the GPU and vGPU software. During this step it’s even more important to create your snapshots because this is where all complexity comes together (Ubuntu 18.04, vGPU 7.2 and Horizon 7.8).
- Shutdown the VM and add the vGPU profile (for workloads that require Compute features, a Q profile is essential). I added a P4_4Q profile.
- Download the NVIDIA vGPU drivers and make sure the installation directory is accessible from the Ubuntu VM.
- Power on the VM
- Open the terminal and go to the folder where the NVIDIA vGPU drivers are located
- Install the driver
- ./NVIDIA-Linux-x86_64-410.92-grid.run
- Reboot
- Go to the Ubuntu VM through SSH
- Blacklist the nouveau drivers
- sudo bash -c “echo blacklist nouveau > /etc/modprobe.d/blacklist-nvidia-nouveau.conf”
- sudo bash -c “echo options nouveau modeset=0 >> /etc/modprobe.d/blacklist-nvidia-nouveau.conf”
- Reboot
- In case you are running into licensing issues, check the following NVIDIA page:
- Configuring Linux vGPU licensing: https://docs.nvidia.com/grid/latest/grid-vgpu-user-guide/index.html#licensing-grid-vgpu-linux
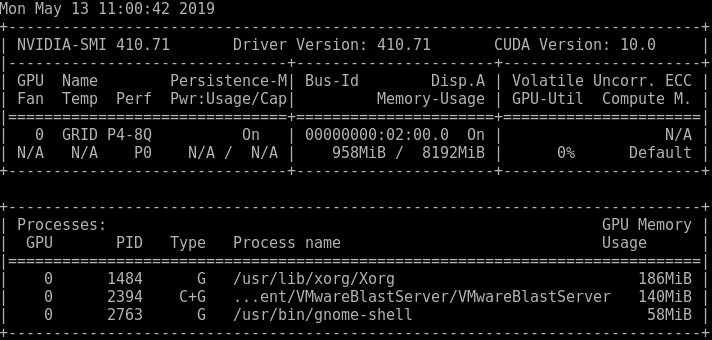
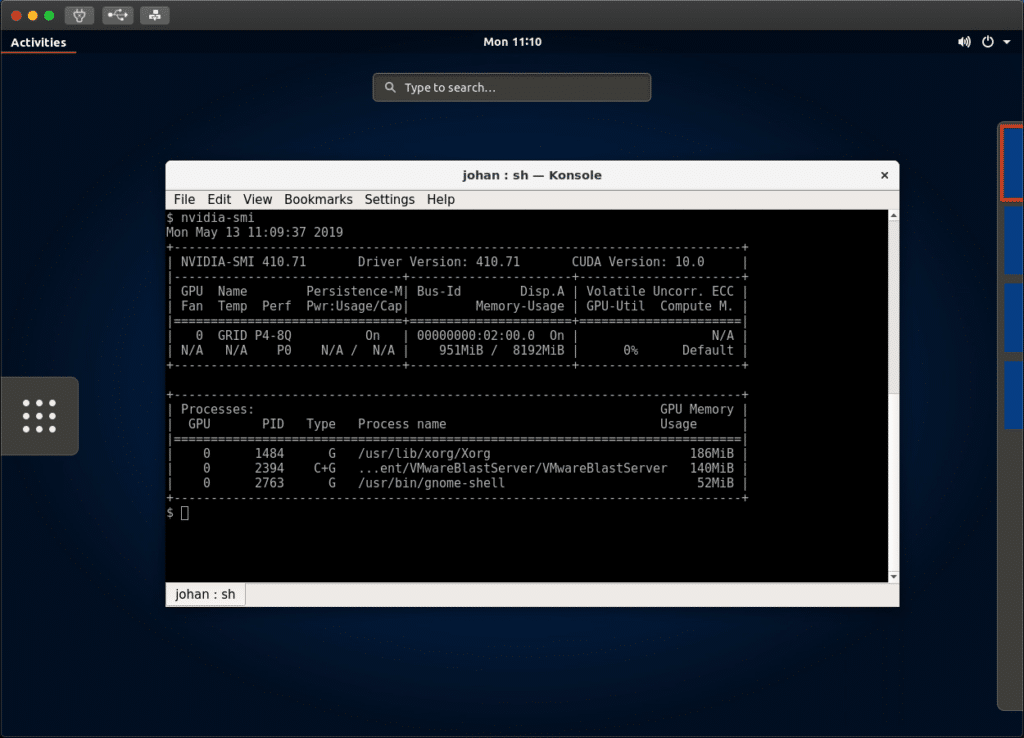
- Test out if the GPU is linked to the VM:
- Start a Terminal session and run nvidia–smi
- If all goes well, it should display something like this:
Horizon Pool Settings
To test if the connection is accepted, I created a manual pool with and added the assignment for the user myself (instead of an automatic assignment, which requires True SSO and LDAP to work). Add the NVIDIA GRID vGPU 3D settings in the pool and finally select the vCenter Virtual Machine to add to the pool.
If all goes well, you should be able to remotely sign in to the virtual desktop (without SSO).
The most ideal combination would be an Ubuntu VM, Instant Clones, vGPU and LDAP. Unfortunately, in Horizon 7.8 and vSphere 6.7u2, that combination isn’t supported yet. So, to be continued..
In the follow-up post, I will share more details around:
- SSO integration
- Docker Installation
- CUDA integration
- Using NGC Containers with vGPU
The post Mastering voodoo: Building Linux VDI for Deep Learning workloads, Part 1 appeared first on vHojan.nl.
The original article was posted on: vhojan.nl