Disclaimer: This is a dirty hack. It is in no way supported or endorsed by VMware. We tried it and it appears to work, with caveats (see end of post).
Update: Feb 2020
Its been pointed out to me that it may be possible to significantly shorted this procedure. Once loaded into the Ubuntu ISO commandline, it should be possible from there to reset the root and admin passwords on that command line. Therefore it would be unnecessary to alter the grub menu to provide the grub single-user mode, thereby skipping the second half of this procedure. I have not tested this.
Scenario: You have lost your NSX-T Edge root password. You may, or may not have lost your NSX-T Edge Admin password also. In any case, you cannot use the CLI to reset root password, cause you dont know the old one.
There are various existing resources out there that kind of describe what to do, but they all involve different scenarios, or only cover the NSX-Managers.
It should also be noted that, giving the option, simply replacing the Edge might be a better option. This is especially true for NSX-T Edges that are only running services components like Load-Balancing in the context of a cluster. Replacing these kinds of edges is very easy and has little impact.
This is also true in principle for Edges that are running as your North-South uplink, but you may want to consider the impact for these more carefully, as they are in most cases running your Tier-0 routers and are directly in the datapath. Rutger Blom made a nice blog post detailing this procedure and I can attest that it works just fine.
https://rutgerblom.com/2019/09/25/nsx-t-recoverability-part-2/
What I describe in this post, is the procedure that you would follow to reset lost root and/or admin passwords, if, for some reason, replacing the edge is not desirable or not possible.
For NSX-T 2.4, the procedure to reset root or admin using Grub is described for the NSX Managers. not the Edges. There appears to be no official procedure for NSX-T edge appliances. However, the procedure is roughly similar for an edge.
The main, and crucial difference is that the password reset in the NSX-T Manager relies on a special function built into the NSX-T Managers, which responds to the presence of a file ‘
/config/vmware/nsx-node-api/reset_cluster_credentials ‘
This way of resetting the root password doesn’t work for edges, as they don’t respond to this file.
Instead, we must rely on using the Linux GRUB menu to boot the Edge into single user mode. This is quite a well-known procedure to recover root in Linux servers and is a time-tested procedure used on other VMware appliances such as the VCSA, or vROPS. (I have done both in the past).
But we face an additional challenge. The GRUB boot menu is not on by default. And the way to turn it on, described here, relies on, you guessed it, root access on the edge Which we do not have. This is a classic chicken-egg problem.
So this dirty hack is actually not all that dirty, its just that we have to combine one procedure with the other in a specific order. And all from the console of the Edge VM.
1. Boot our NSX Edge from an Ubuntu ISO image, to access recovery mode
2. Get into the recovery mode shell, mount the edge boot disk, and manually edit the grub config file, to enable the grub menu
3. Reboot and get into the Grub menu
4. Use Grub menu to boot into Linux in single-user mode
5. Reset root and/or admin password.
Prepare for some frustration, as we need to execute all these steps from the console of the edge VM itself. That means copy-pasting probably wont work, and you need to be super careful in what you type.
Also, I recommend using the VMware Remote Console, as this will allow us to mount the Ubuntu ISO directly from our desktop, so we don’t have to upload it to a datastore.
Make sure you have the Ubuntu 16.04 server ISO downloaded.
Procedure
If you are still able to log into your Edge, maybe because you still know the admin password, but not the root, its good practice to put the edge into maintenance mode.
set maintenance-mode enableIf you have lost your admin password, you can’t enable maintenance mode. In this case, just use vcenter to do a clean shutdown of the OS. For more information on how maintenance works with Edge HA pairs, have a look at this excellent post:
https://www.spillthensxt.com/nsx-t-edge-maintenance-mode/
Now you have the option of making a snapshot of the Edge. Snapshots on edges are not supported. And reverting a snapshot may lead to weird behavior. Honestly, if you somehow brick or mess-up your edge, you should just create a new one and swap the old one out for the new one in the cluster.
Having said that, snapshots do work. We recovered a broken edge quickly using it, see Caveats section at the bottom of this post.
If you choose to make a snapshot, only do it when the edge is OFF.

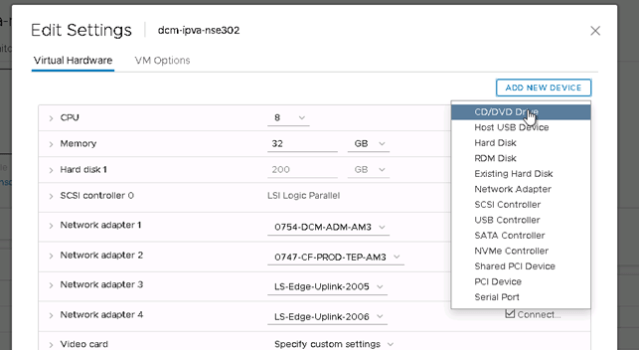
While your edge is off, attach a DVD drive.

Go to VM options and set the Boot Delay to 5 or 10 seconds. This will give you enough time to interrupt the boot so you can get into the boot menu, and later, get into the Grub menu.
We are now basically following the first section of the procedure detailed here:
https://docs.vmware.com/en/VMware-NSX-T-Data-Center/2.4/administration/GUID-8816B842-2EC4-40A8-A618-F68DB29FABD2.html , but remeber, that procedure is for the NSX Managers, not the edges. And we will be diverging from it at step ‘o’.
Using the VMware Remote Console, attach our Ubuntu 16.04 server ISO

Now we can turn the Edge VM back on. The post menu should appear, hit ESC to get into the boot menu. Boot from the CDROM.


Walk through setup with options:
- English
- Country: <your country> Other → europe → netherlands
- locale: US
- Keyboard: No autodetection → US with dead keys

We are not using the network, but it needs to timeout on getting DHCP from one of the interfaces anyway. This might take a while, just be patient.

Give it any host name, doesn’t matter what.

Choose ‘Do not use a root file system. ‘

Choose ‘ Execute a shell in the installer enviroment’

You should now get a prompt. From here we are able to mount the disk and filesystem of the edge. That will enable us to edit the Grub config, to activate the Grub Menu. This is the part where we diverge from the NSX Manager password reset procedure.
Run the following commands on the shell:
mount /dev/sda2 /mnt
mount --bind /dev /mnt/dev
chroot /mnt
mount /config
mount /boot
cd /etc/default
You can now look at the current Grub config with ‘cat grub’

The line we are going to change is GRUB_HIDDEN_TIMEOUT=
In this example I will change it to 2, for 2 seconds, as that is all I will need to hit ESC at the right time. But you can increase it if you want.
For more information on this config file, have a look at
https://www.howtogeek.com/196655/how-to-configure-the-grub2-boot-loaders-settings/
We will now edit this file using ‘sed’. The reason we are using ‘sed’ is because we ran into some strange terminal issues with keyboard input, making it impossible to use ‘vi’ properly
Of course, first make a backup of the file. You will notice there is already a grub.bak present, so just name yours grub.bak2
cp grub grub.bak2
sed -i 's/GRUB_HIDDEN_TIMEOUT=/GRUB_HIDDEN_TIMEOUT=2/g' grub
Now if we ‘cat’ our grub file, you can see that the entry is changed.
Now comes a scary part. To commit the grub config, we need to run ‘update-grub’. When we do this now, we see a load of stuff seemingly going wrong. This is probably due to the fact that this is a barely functional shell environment, and half the filesystem is not properly mounted.
In any case, it still works, but this is the part where unintended consequences can happen, see caveats section at the bottom.
If you are gonna break your edge, this is where it will happen, and this might be a reason to have a snapshot of the edge to revert to.
update-grub
Now we run ‘sync’ to commit all writes to disk, in case they have not been yet.
sync
exit
Now you can reboot. Get ready to hit that ESC key!
Remember we set our VM Post menu to display for 10 seconds.
Do not enter the boot menu, dont to anything, just let it count down.
Right after it ends it countdown, the moment the screen turns black, hit ESC inside our 2 second window, and you should get the GRUB screen.

We can now press ‘e’ to load Ubuntu (remember this is NOT our ISO, this is the Edge VM itself!)
Now you must login. The Grub login for NSX-T Manager VMs and NSX-T Edge VMs (and many other VMware appliances going back years) is root/VMware1
This part of the procedure is well documented all over the place. Scroll down and go to the line starting with ‘linux’.
Remove all options after ‘root=UUID=’.
Add the following option:
rw single init=/bin/bash
Hit ctrl-x to continue booting.
We end up in a simple prompt, where we can now reset the root and the admin password. For any account other than root, you must supply the username. Have fun typing your strong password blind into the console, twice 
passwd
passwd admin
Now we can sync and reboot.
sync
reboot -f
This should be it. Our VM post menu is still active, so that will timeout for 10 seconds.
What we observed ourselves is that sometimes also the Grub menu now always appears, and will time out for 30 seconds. I am not sure why its doing this, you would have to dig into the Grub config more yourself. We found this extra wait acceptable and decided to just leave it as-is.
Observe the edge booting, it should return to the normal prompt quicky. You can now attempt to login here, or login with SSH. Remember you can check your root password from the admin console by going into engineering mode with ‘st en’.
If you originally placed the Edge into maintenance mode, don’t forget to take it out of maintenance mode again. Check your NSX-T Edge cluster node list to see if the edge returns healthily. It should show Configuration Status as ‘Success’ and Node Status as ‘up’.
Caveats
We tried this procedure on 2 types of edges. Edges that had been created in NSX-T 2.4.1 natively, and Edges that had been created in NSX-T 2.3.x and upgraded later to 2.4.1.
This procedure failed on the upgraded Edges, because, for some reason, after updating Grub and resetting the passwords, the Edges booted into a seemingly old boot image… of version 2.3.x , even though the Grub boot selection (0, or 1, or 2) remained unchanged. We have no explanation for this, and where forced to revert back to our snapshot to get the Edge working again (but still without the ability to log in).
This problem was not encountered at all, with Edges that where created natively on NSX-T 2.4.1, and with those, this procedure works and is successful. I can only imagine this is being caused by update-grub doing something horrible. I don’t understand enough about the boot mechanism to diagnose this any further.
This procedure was done only on NSX-T 2.4.1. It has not been tested on any other version of the Edges.
The procedure works for both Edges that run Uplinks and Tier-0 routers, as well as Edges that only run SR components. Our SR Edges only do Load-Balancing, this procedure was not tested with any other service.
Credits
This procedure was put together by myself, and Olivier Bootsma and Bart Mulder, my colleagues at ITQ.
I also used the following resources:
https://www.howtogeek.com/196655/how-to-configure-the-grub2-boot-loaders-settings/
https://www.spillthensxt.com/nsx-t-edge-maintenance-mode/
https://rutgerblom.com/2019/09/25/nsx-t-recoverability-part-2/
The original article was posted on: thefluffyadmin.net

