When you talk about VMware Horizon (Instant Clones), App Volumes and User Environment Manager, you’re talking about JMP.
JMP (pronounced jump) stands for Just-in-Time Management Platform and represents the capabilities of a VMware Horizon 7 Enterprise environment that delivers Just-in-Time Desktops and Apps in a flexible, fast, and personalized manner.
With JMP assignments integrated in the Horizon Management Console, I see some cool use-cases to manage instant clone pools, applications and settings all in one.
So, I’ve installed the 3 horizon products in my lab and I’m taking the next step and install and configure a JMP server to use all components to its maximum capabilities.
In this series of blogs will guide you on how to install and configure JMP for your own environment.
Part one: Prerequisites
Before you start with the JMP installation, there are some prerequisites you need to configure.
- Install a new server. I use a Windows Server 2016 VM with 4 vCPUs, 4 GB of memory, and 50 GB of storage.
- Go to your SQL server and launch the SQL Server Management Studio.
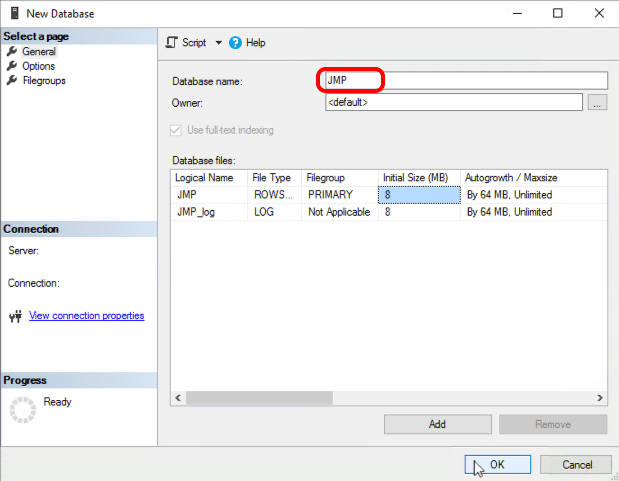
- Create a new database. Leave everything default en click OK.

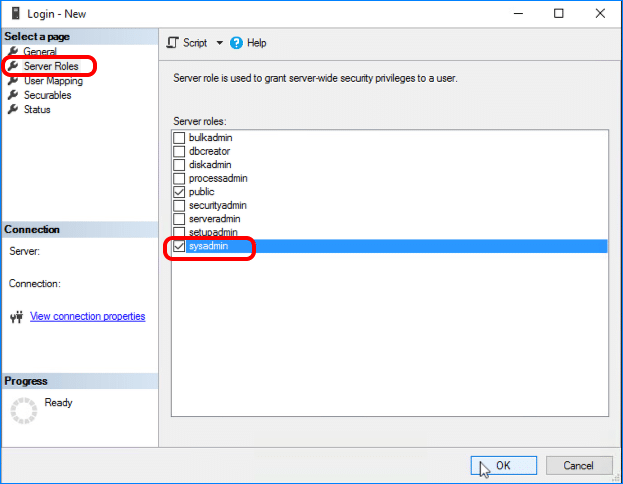
- Create a login for the computer account that will host the JMP server.
- Select Server Roles and check sysadmin.

- Select User Mapping and map the JMP database to the account.
- Click OK to finish.
All prerequisites are done, in the next part I’ll explain how to install the JMP server.
JMP: Installing and Configuring – Part One
JMP: Installing and Configuring – Part two
JMP: Installing and Configuring – Part three
JMP: Installing and Configuring – Part four
JMP: Installing and Configuring – Part five
Het bericht JMP: Installing and Configuring - Part One verscheen voor het eerst op Age Roskam.
The original article was posted on: ageroskam.nl


