As a geospatial scientist, you might wonder how your custom made applications and visualization portals can turn into web applications that run in the cloud. WARNING: This can take you down a rabbit hole so deep you end up with a career in cloud computing.
A few months back, I stumbled upon Greppo an open-source data science framework for building GIS applications that an old colleague of mine at TU Delft was building. Many might not know, but I got into IT through Geographic Information Systems, and all the data preparation/analysis/presentation that comes with it. What I did not know then, is how to architect and deploy my GIS applications to run as a distributed applications in the cloud. But I also can’t say I have all the answers yet. That is why I see myself in a journey of bridging my knowledge gap on what goes between data science and IT operations, which of brings me to application development.
As a preparation for the GCP Professional Cloud DevOps Engineer and GCP Professional Cloud Developer, I decided to take one of the Greppo example apps and automate its deployment in Google Cloud. I usually spend a lot of time on Kubernetes, but this time I wanted to learn how Google Cloud leverages the power of serverless computing with Cloud Run and Cloud Functions, inspired by Wietse Venema’s book Building Serverless Applications with Google Cloud Run.
Greppo
Greppo is a python framework for quickly creating geospatial applications and visualization portals. It uses geopandas, a popular open source project which simplifies working with geospatial data in python. Geopandas itself extends the datatypes in the famous pandas library to allow spatial operations on geometric types (performed by shapely and plotted with matplotlib).
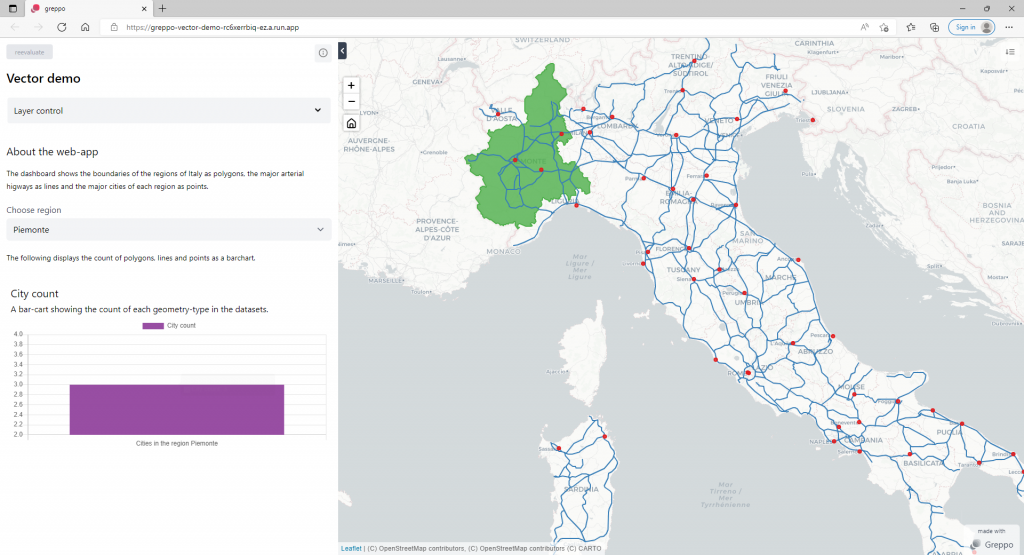
How does an example Greppo app look like?
Let’s look at the official documentation on deploying a Greppo app, and bring our attention to the Dockerfile provided in greppo-demo:
# syntax=docker/dockerfile:1
FROM python:3.9-slim-buster
WORKDIR /src
COPY /vector-demo .
RUN pip3 install -r requirements.txt
CMD ["greppo", "serve", "app.py", "--host=0.0.0.0"] # Will serve on port 8080 of the container
The Dockerfile is rather simple, all it does is copying the application code into the container, installing the required python packages (with pip) and finally serving the application, defined on app.py. So far so good, right? Let’s now look at the application code and focus on how it imports the data:
regions = gpd.read_file("./regions.geojson")
# Display a layer in the map "the Greppo way"
app.vector_layer(
    data=regions,
    name="Regions of Italy",
    description="Polygons showing the boundaries of regions of Italy.",
    style={"fillColor": "#4daf4a"},
)
We can see that the data is contained in geojson files, which are being loaded from the the same directory where app.py is located. While this might be ok for development when running it on your laptop, it is certainly a terrible practice in the context of containerized applications. And why is that? Containers are not meant to have a long life, which means any data stored within them will be lost the moment they stop running. A container orchestrator like Kubernetes handles this with persistent volumes which are then attached to containers when they start, although it is generally a good idea to keep data outside of your Kubernetes cluster anyway. In any case, today I am not here to write about Kubernetes. Since we are just running a simple python application, we don’t need an entire Kubernetes cluster; we can deploy it in Google Cloud Run.
Running the app in Google Cloud
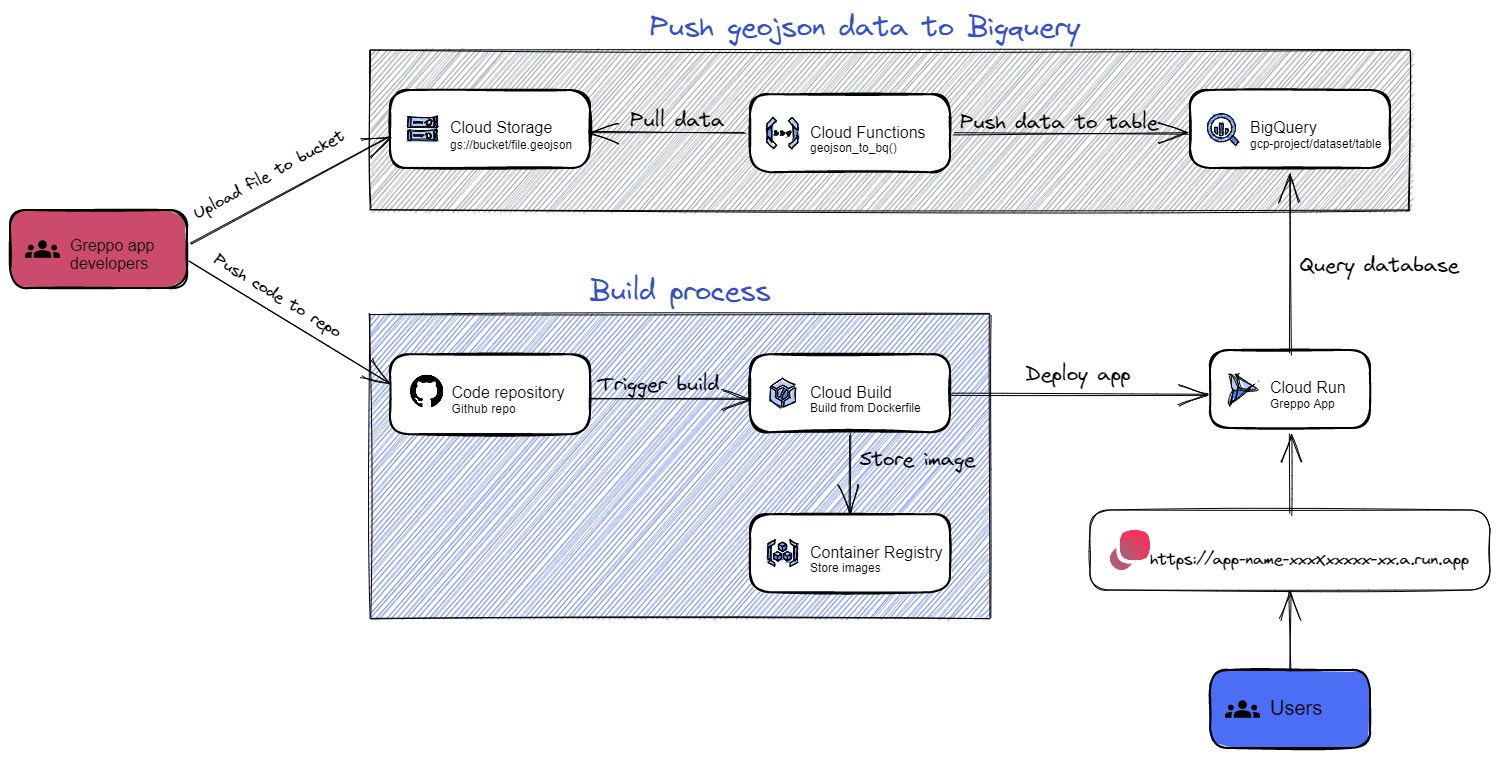
For this exercise we are going to deploy a simple python app in Cloud Run, which is a fully managed serverless platform in Google Cloud, compatible with knative. But, before doing that, we will store the geojson files in a Cloud Storage Bucket, which will allow you to import your data into your application. I will also go one step further and show how to push data to Bigquery so that you can include some advanced spatial queries in your application (similar to geopandas, but being processed in your database).
To build our application, we will use these fully-managed services and serverless runtimes, all included in the free tier:
- Cloud Storage: Object store. Mymics a typical filesystem, which is perfect to store our geojson files. Think of it as a global folder which serves your files through HTTP.
- Bigquery: Serverless Data warehouse. To include advanced geospatial queries in our application.
- Cloud Functions: Event-driven serverless runtime. To enable the push of geojson data from Cloud Storage to Bigquery through an HTTP call.
- Cloud Build: Serverless CI/CD pipeline engine. To trigger the deployment of the application each time new code is pushed to our Github repository.
- Container registry: Container registry. Where our container images will be stored.
- Cloud Run: Serverless runtime. To run our Greppo application.
Let’s now look at how these services will be configured to provide a scalable, highly available architecture for our automated deployments:
These are the steps we will take to deploy our Greppo application:
- Store geojson files in a Cloud Storage bucket: So that they are accessible within your Google Cloud Project.
- Create a Bigquery dataset.
- Create a service account: Which will be assigned to the Cloud Function so that it can pull data from Cloud Storage and push it to Bigquery.
- Create a Cloud Function to push the data: Which will push data from a bucket into Bigquery upon (HTTP) request.
- Push data to Bigquery.
- Install the Cloud Run App in your Github repo.
- Automate the app build & deploy process with Cloud Build.
Step 1: Store .geojson files in a Cloud Storage bucket
Greppo’s vector example displays the entirety of road network, cities and regions in Italy. Each geodataframe is contained in a different geojson file, which will have to be uploaded to the Cloud Storage bucket. you can just download them from the Greppo-Demo Github repo:
Create the bucket and copy the files into it:
So that’s it, your .geojson files live now in your newly created bucket. You can delete the files from your cloud console disk since you won’t need them there anymore.
rm -rf greppo-demo-data/If you want to keep it simple and import your data from the bucket you could just do it as such:
Loading a file into your application (example)
Congratulations! You have now reduced the dependency on your container’s local filesystem, which is certainly a step towards building a cloud-native application. While you could just now get back to writing your code and do the rest of data and geospatial processing with pandas/geopandas, It is advisable to push the data to a database engine to perform more advanced spatial queries while offload some processing to it.
Step 2: Create a Bigquery dataset
While you could create a Cloud SQL and deploy a Postgres database instance (with PostGIS), you would then be billable for the resources allocated to provision this database. With Bigquery, you will only pay for what you use, and it can also perform geospatial analytics!
Create a Bigquery dataset:
bq mk -d <YOUR_DATASET_NAME> \
--location=<YOUR_GCP_REGION> \
--description="<DATASET_DESCRIPTION>"
Step 3: Create a service account
Since your Cloud Function will need to authenticate to read the files from Cloud Storage and to push them to Bigquery, you will need to create a service account:
Bind the service account to the Cloud Storage object viewer role, so that it can read the .geojson files from the bucket:
gcloud projects add-iam-policy-binding <YOUR_PROJECT_NAME> \
    --member="serviceAccount:greppo-bq-data-pusher@<YOUR_PROJECT_NAME>.iam.gserviceaccount.com" \
    --role="roles/storage.objectViewer"
Bind it as well to the Bigquery data owner role, so that it can create tables and push data to them:
gcloud projects add-iam-policy-binding <YOUR_PROJECT_NAME> \
    --member="serviceAccount:greppo-bq-data-pusher@<YOUR_PROJECT_NAME>.iam.gserviceaccount.com" \
    --role="roles/bigquery.dataOwner"
Step 4: Create a Cloud Function to push the data
Clone my Github repo, which contains all code needed to finish this exercise.
You can see the function by running cat greppo-google-cloud/functions/bucket_geojson_to_bq/bucket_geojson_to_bq.py or in Github by clicking here.
Deploy the function
The function will take the following parameters from the HTTP request:
- Google Cloud project name
- Bucket name
- Path to file (within the bucket)
- Dataset name
- Table name (to create and push the data to)
Step 5: Push data to Bigquery
Push the data to Bigquery by running:
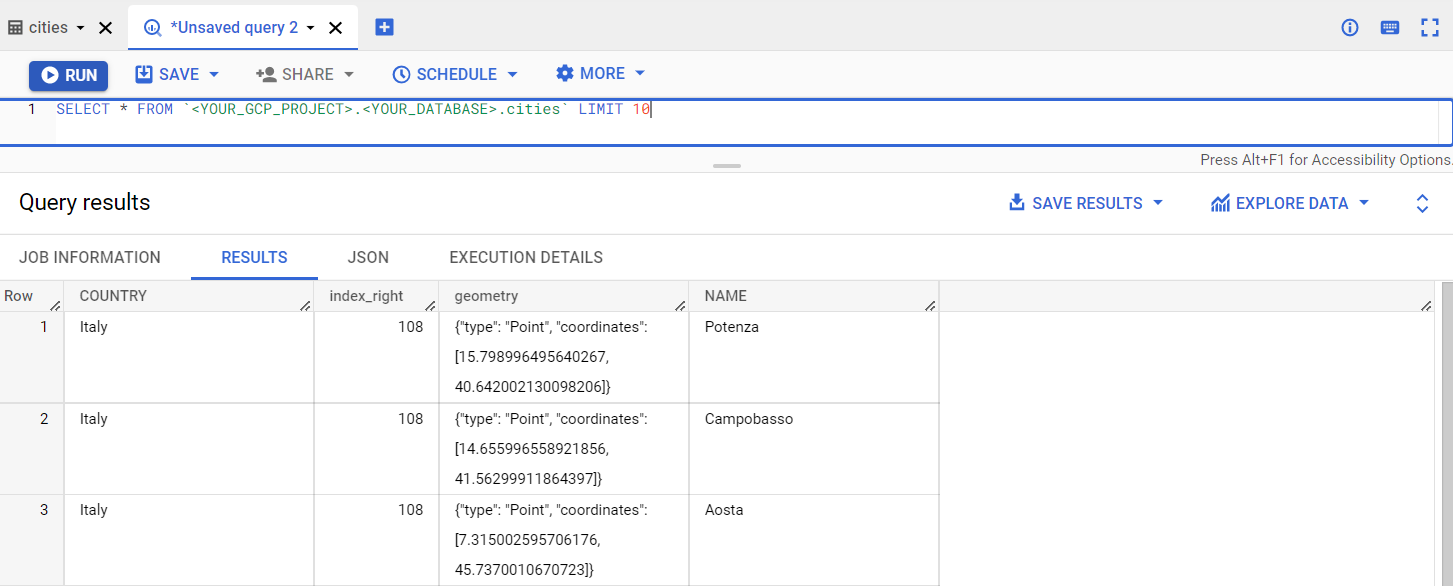
Do a test query in Bigquery’s interactive console (example)
Confirm that your data was successfully uploaded by navigating to your Bigquery database by running a query against one of your newly created tables:
SELECT * FROM table `<YOUR_GCP_PROJECT>.<YOUR_DATASET>.cities` LIMIT 10Loading the data from Bigquery (example)
We can load the data from Bigquery into our python script like so:
The get_geodataframe() function pulls the whole table and returns a geodataframe object.
More example queries
I additionally created another two python functions to query the Bigquery datasets. In this case there is one to choose a geographic feature just by name, and a second one which will display all points contained within a given polygon (for example to see how many cities are in a specific region)
Step 6: Install the Cloud Build App in your Github repo
Cloud Build is a service that executes your container builds on Google Cloud. It works by importing source code from diverse sources (Cloud Storage, Cloud Source Repositories, Github…). To enable Cloud Build to automatically build containers using Github as source repository, you will have to install the Cloud Build App in your repo. (Don’t forget to fork my repo, which is where you will install the Cloud Run app)
Unfortunately, there is no way to perform the installation with the gcloud or the git CLIs, so you will have to use Github’s user interface.
Click here to install the Cloud Build app in your Github repo.
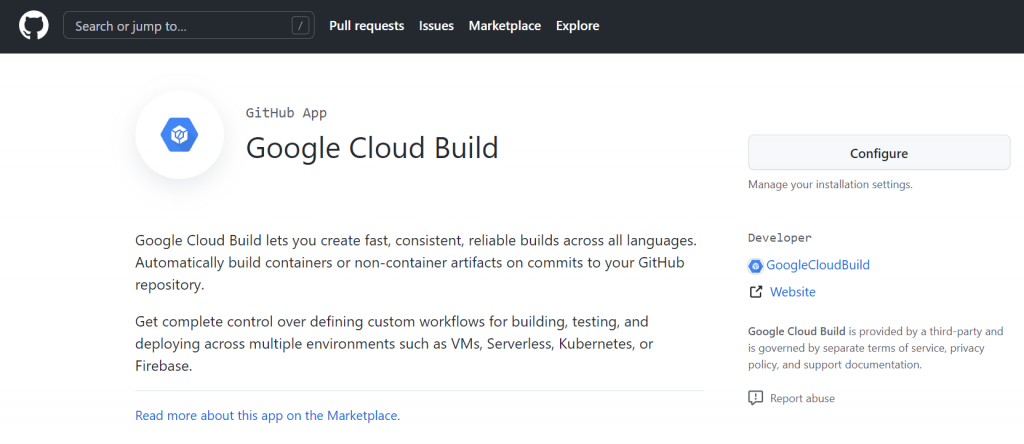
Step 7: Automate the app build & deploy process with Cloud Build
We will now create a Cloud Build trigger that will deploy a new version of our application every time there is a new push to the repo’s ‘main’ branch. You also could create more triggers pointing to other branches in order to test your app’s new features before pushing them to the ‘main’ branch. I wrote a relatively simple build config file which will execute these three steps:
- Build container’s new version from source code
- Push it to Container Registry
- Deploy it to Cloud Run as a the app’s new version
Let’s now create that trigger:
gcloud beta builds triggers create github \
    --name greppo-italy \
    --branch-pattern="^main$" \
    --repo-name=greppo-google-cloud \
    --repo-owner=<YOUR_GITHUB_USERNAME> \
    --build-config="./cloud_build/config.yaml" \
    --substitutions _PROJECT=<PROJECT_NAME>,_DATASET=<DATASET_NAME>,_DEPLOY_REGION=<YOUR_GCP_REGION>,_SERVICE_NAME=<YOUR_SERVICE_NAME>,_MAX_INSTANCES=<MAX_INSTANCES>
You can now see the newly created trigger in Cloud Build:

If you do not want to make any changes to the application right now, you can just click RUN and manually trigger the build.
If you want your application to be accessible to through the Internet, allow unauthenticated users by running:
gcloud run services add-iam-policy-binding <YOUR_SERVICE_NAME> \
    --member="allUsers" \
    --role="roles/run.invoker" \
    --region=<YOUR_GCP_REGION>
Now you can go to your application in the Cloud Run menu, and click at the external link, which will display your running application on a new browser tab:
Last words
It is important to remember that, you could use this approach to deploy many different applications. Our code simply loads our data from Bigquery and uses Greppo to render it in a map (together with a side bar).
Like many of my blogposts, this was both a learning process for me as well as an opportunity to share what I have been learning on a specific topic. If you have suggestions about how to implement anything better, please let me know in the comments below.

